
AACA bridges that gap and brings everyone together. There’s something for everybody. They’re totally inclusive.
“AACA is the glue that keeps this car hobby together.”
“Hands down the best swap meet in the world.”
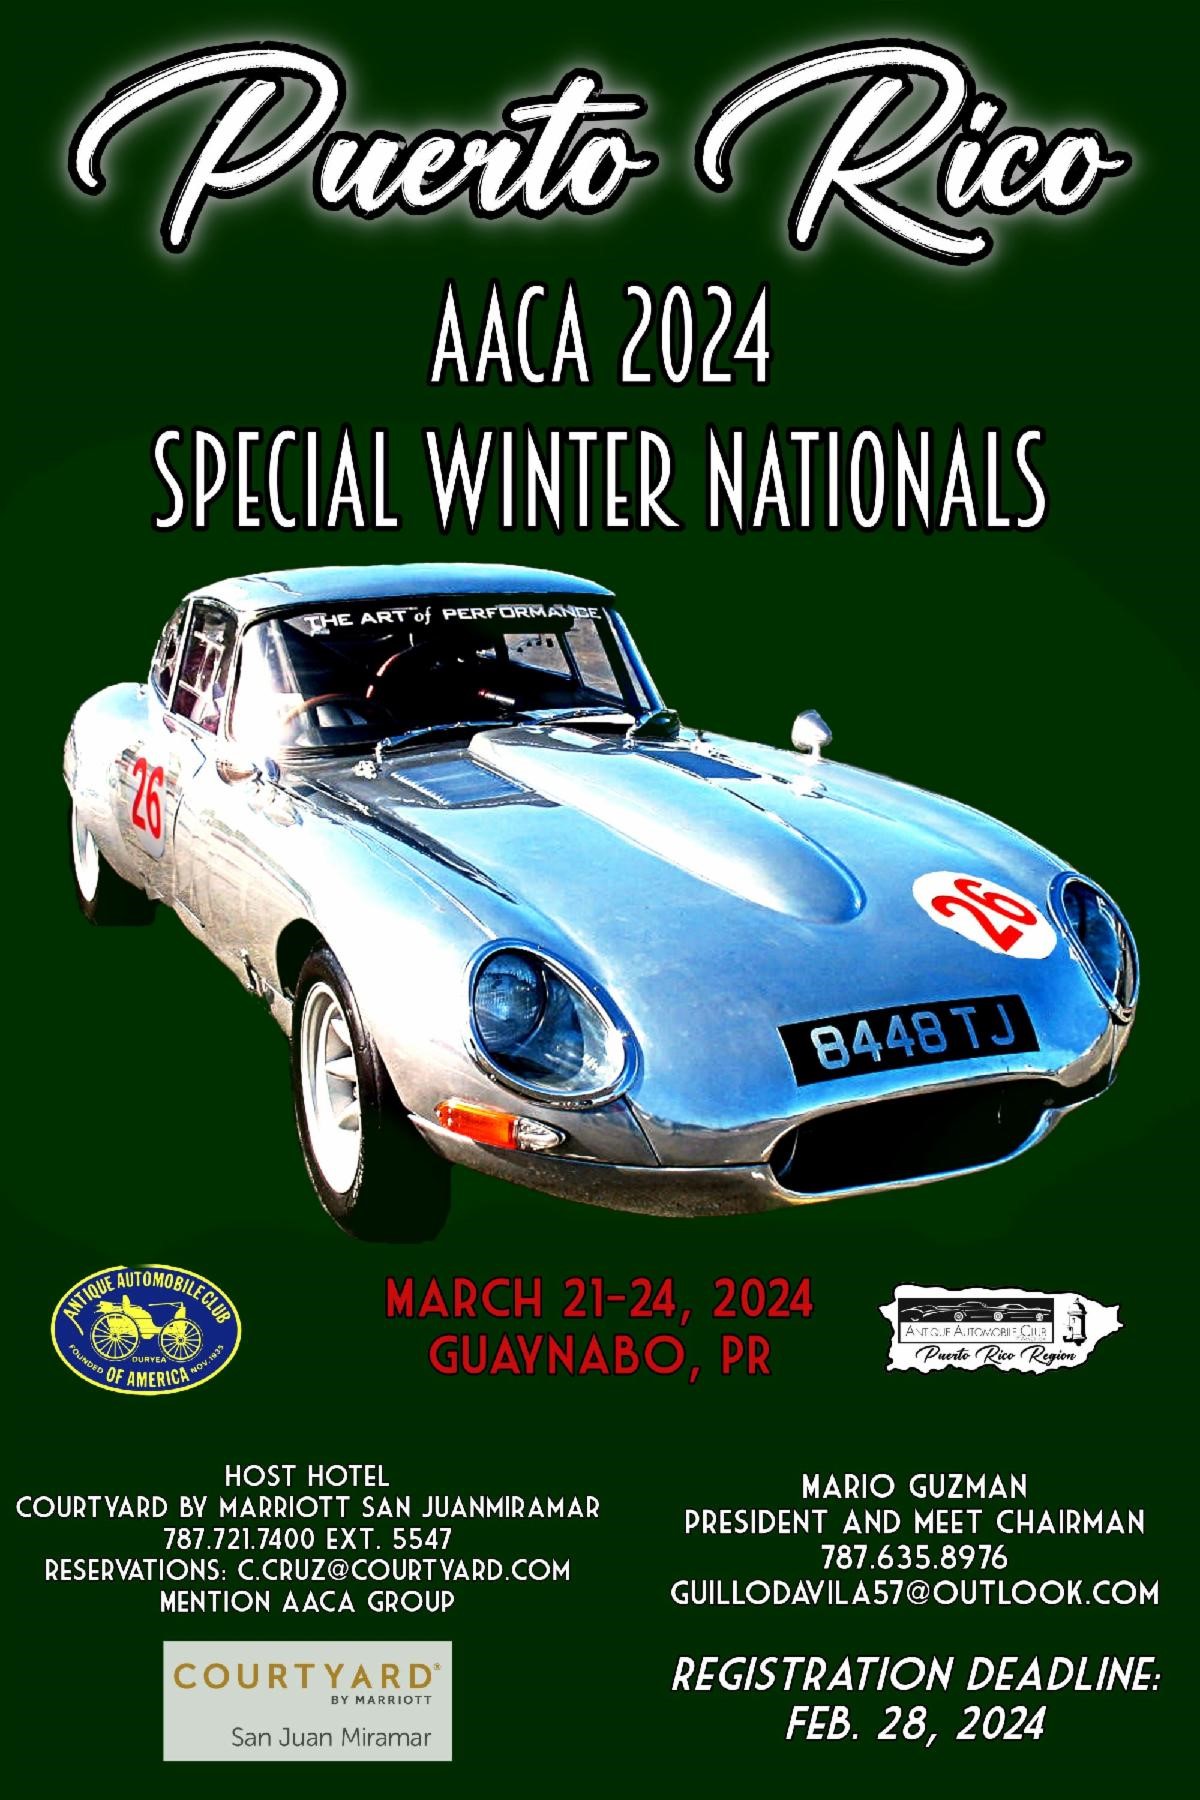
2024 Special Wintrer
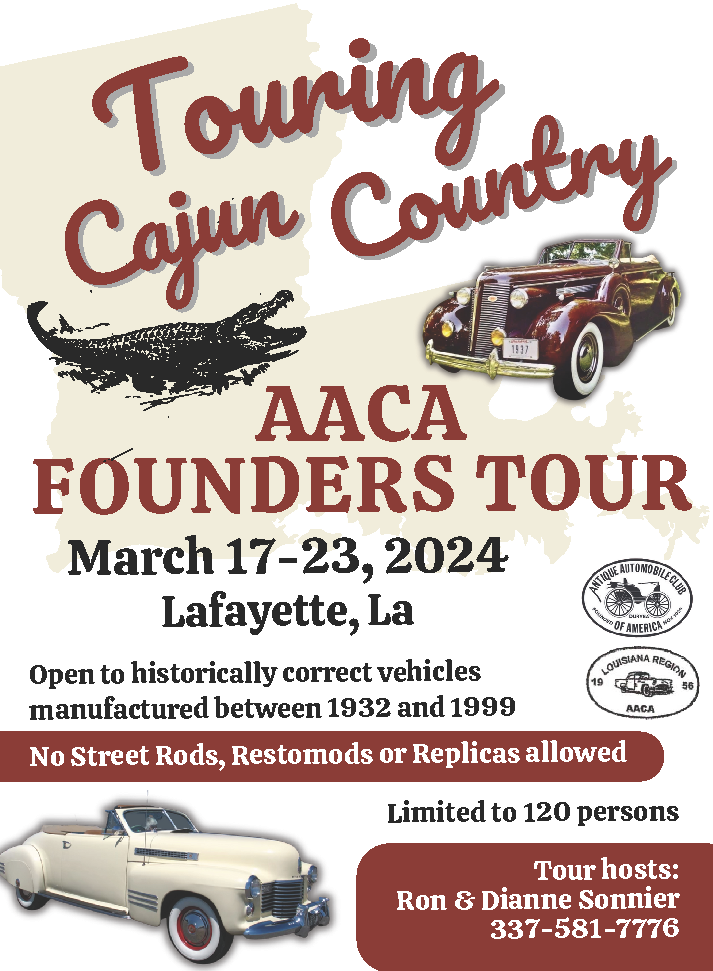
2024 Founders Tour
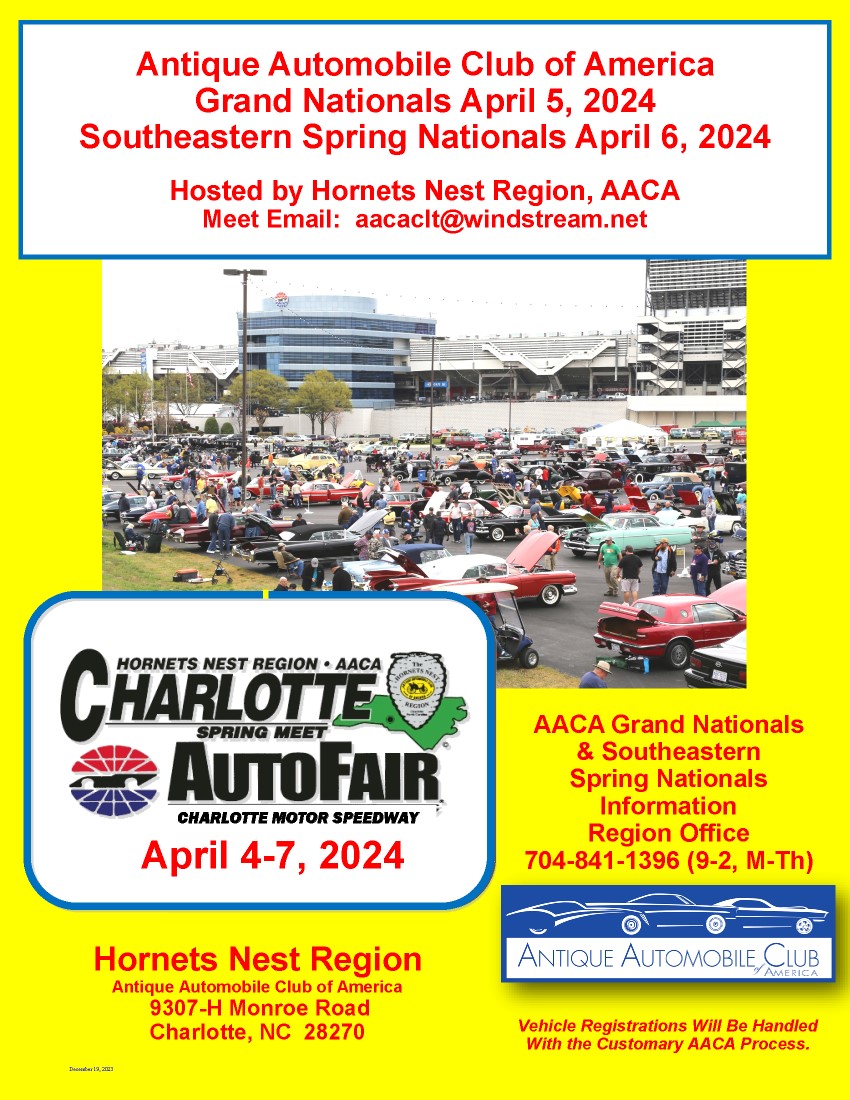
2024 Charlotte Duals
AACA In Person
Join us for a Tour and exercise your car! We plan the entire itinerary for you — scenic stops, hotel accommodations, meals, receptions, and more.

AACA Online
We have 120 forum discussion threads so you can buy, sell, chat, connect, and learn from fellow car enthusiasts from around the world.
AACA at Home
There’s nothing better than joining one of our Local Regions and Chapters and finding your people. After all, car people are the BEST people!

The atrium is looking a little bare. Something new is on its way, check back later for the reveal! Let the guessing begin. What do you think or want us to display front and center? #somethingsmissing

The atrium is looking a little bare. Something new is on its way, check back later for the reveal! Let the guessing begin. What do you think or want us to display front and center? #somethingsmissing
Another new display here at HQ to check out! A Whizzer S-10. #antiquecars #antiqueautomobileclubofamerica #aaca #whizzer #whizzermotorbike
Another new display here at HQ to check out! A Whizzer S-10. #antiquecars #antiqueautomobileclubofamerica #aaca #whizzer #whizzermotorbike
Check out one of our newest displays here at HQ a 1926 Pontiac “Boat Tail” Hillclimb Speedster. First documented race was in August 1926 and it was retired in 1932. #antiquecars #antiqueautomobileclubofamerica #aaca #pontiac #race #car #racecar #hillclimbracing
Check out one of our newest displays here at HQ a 1926 Pontiac “Boat Tail” Hillclimb Speedster. First documented race was in August 1926 and it was retired in 1932. #antiquecars #antiqueautomobileclubofamerica #aaca #pontiac #race #car #racecar #hillclimbracing
Last week to check out the 1970 Chevrolet Camaro Rally Sport that’s been on display here at HQ. Look for it at the Southeastern Spring Nationals in Charlotte, NC, on Saturday, April 6, before it heads home. #southeasternspringnationals #antiquecarshow #antiquecars #antiqueautomobileclubofamerica #aaca #camaro
Last week to check out the 1970 Chevrolet Camaro Rally Sport that’s been on display here at HQ. Look for it at the Southeastern Spring Nationals in Charlotte, NC, on Saturday, April 6, before it heads home. #southeasternspringnationals #antiquecarshow #antiquecars #antiqueautomobileclubofamerica #aaca #camaro